 |
| Click here for original instructions and info from CraftBits.com |
It's been YEARS since I've made any type of Halloween decoration other than the cornstalks we put up outside this year. I think I'll give this one a try. If you are from Minnesota and familiar with "Fleet Farm" or "Home Depot" you may have some of these orange shopping bags available already.
What you need
1/2 orange plastic party table cloth or similar plastic or material.1 black plastic garbage bin liner or bag.
1 wire coat hanger
Scissors
Halloween trinket for center of wreath (optional)
Instructions
Start by taking you wire coat hanger and bending it into a circle.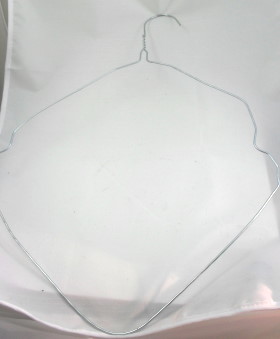

Tie the plastic strips around the wire by tying a single knot.
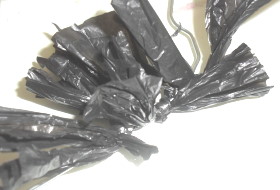
Keep doing this until the wire is full. It should be thick (around 1 hour). You can trim any long pieces when finished with the scissors.

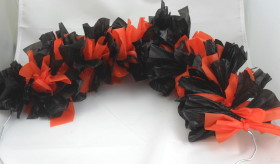

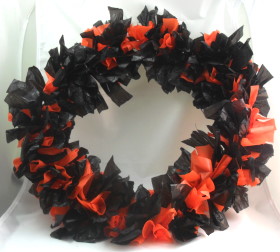
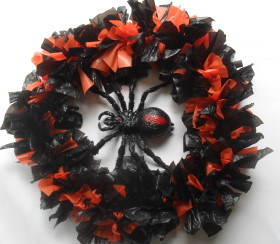
Finish off your wreath by adding a center piece. You can do this by tying a Halloween trinket (we used a giant rubber spider) into the center with fishing line.

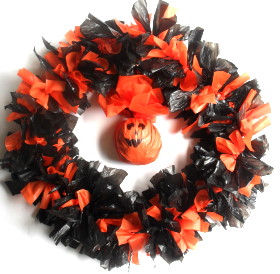

We used some orange raffia for a different effect.


~~~~~~~~~~~~~~~~~~~~~~~~~~~~~~~~~~~~~~~~~~~~~~~~~~~~~~~~~~~~~
My
personal suggestions and opinions are usually in this green italic type
- so in this way you will know when it is me or the person from whom I
am inquiring information. I usually give you the overall idea of any given post I find, because I base it on my own understanding. Plus I want to give credit where credit is due by sending you to the original authors posting for any extra info. It's only fair.
I hope this information has been of some help to you. As always, if you would like to add a thought, question, give suggestions for another topic, or make a general suggestion, please post a comment below. Also, please follow / subscribe to this blog. Thank you!

No comments:
Post a Comment